Labeling Process
This guide explains how to label events effectively, following best practices for accuracy and consistency.
1. Screenshot Annotation
The first step in the labeling process is to annotate the uploaded event correctly.
Opening the Screenshot Editor
- Select the event you want to annotate from the list.
- Hover over the screenshot and click the Edit icon in the middle to open the screenshot editor.
Setting the Bounding Box and Click Position
- In the editor, click to define the bounding box around the relevant area.
- Mark the exact position of the mouse cursor within the screenshot.
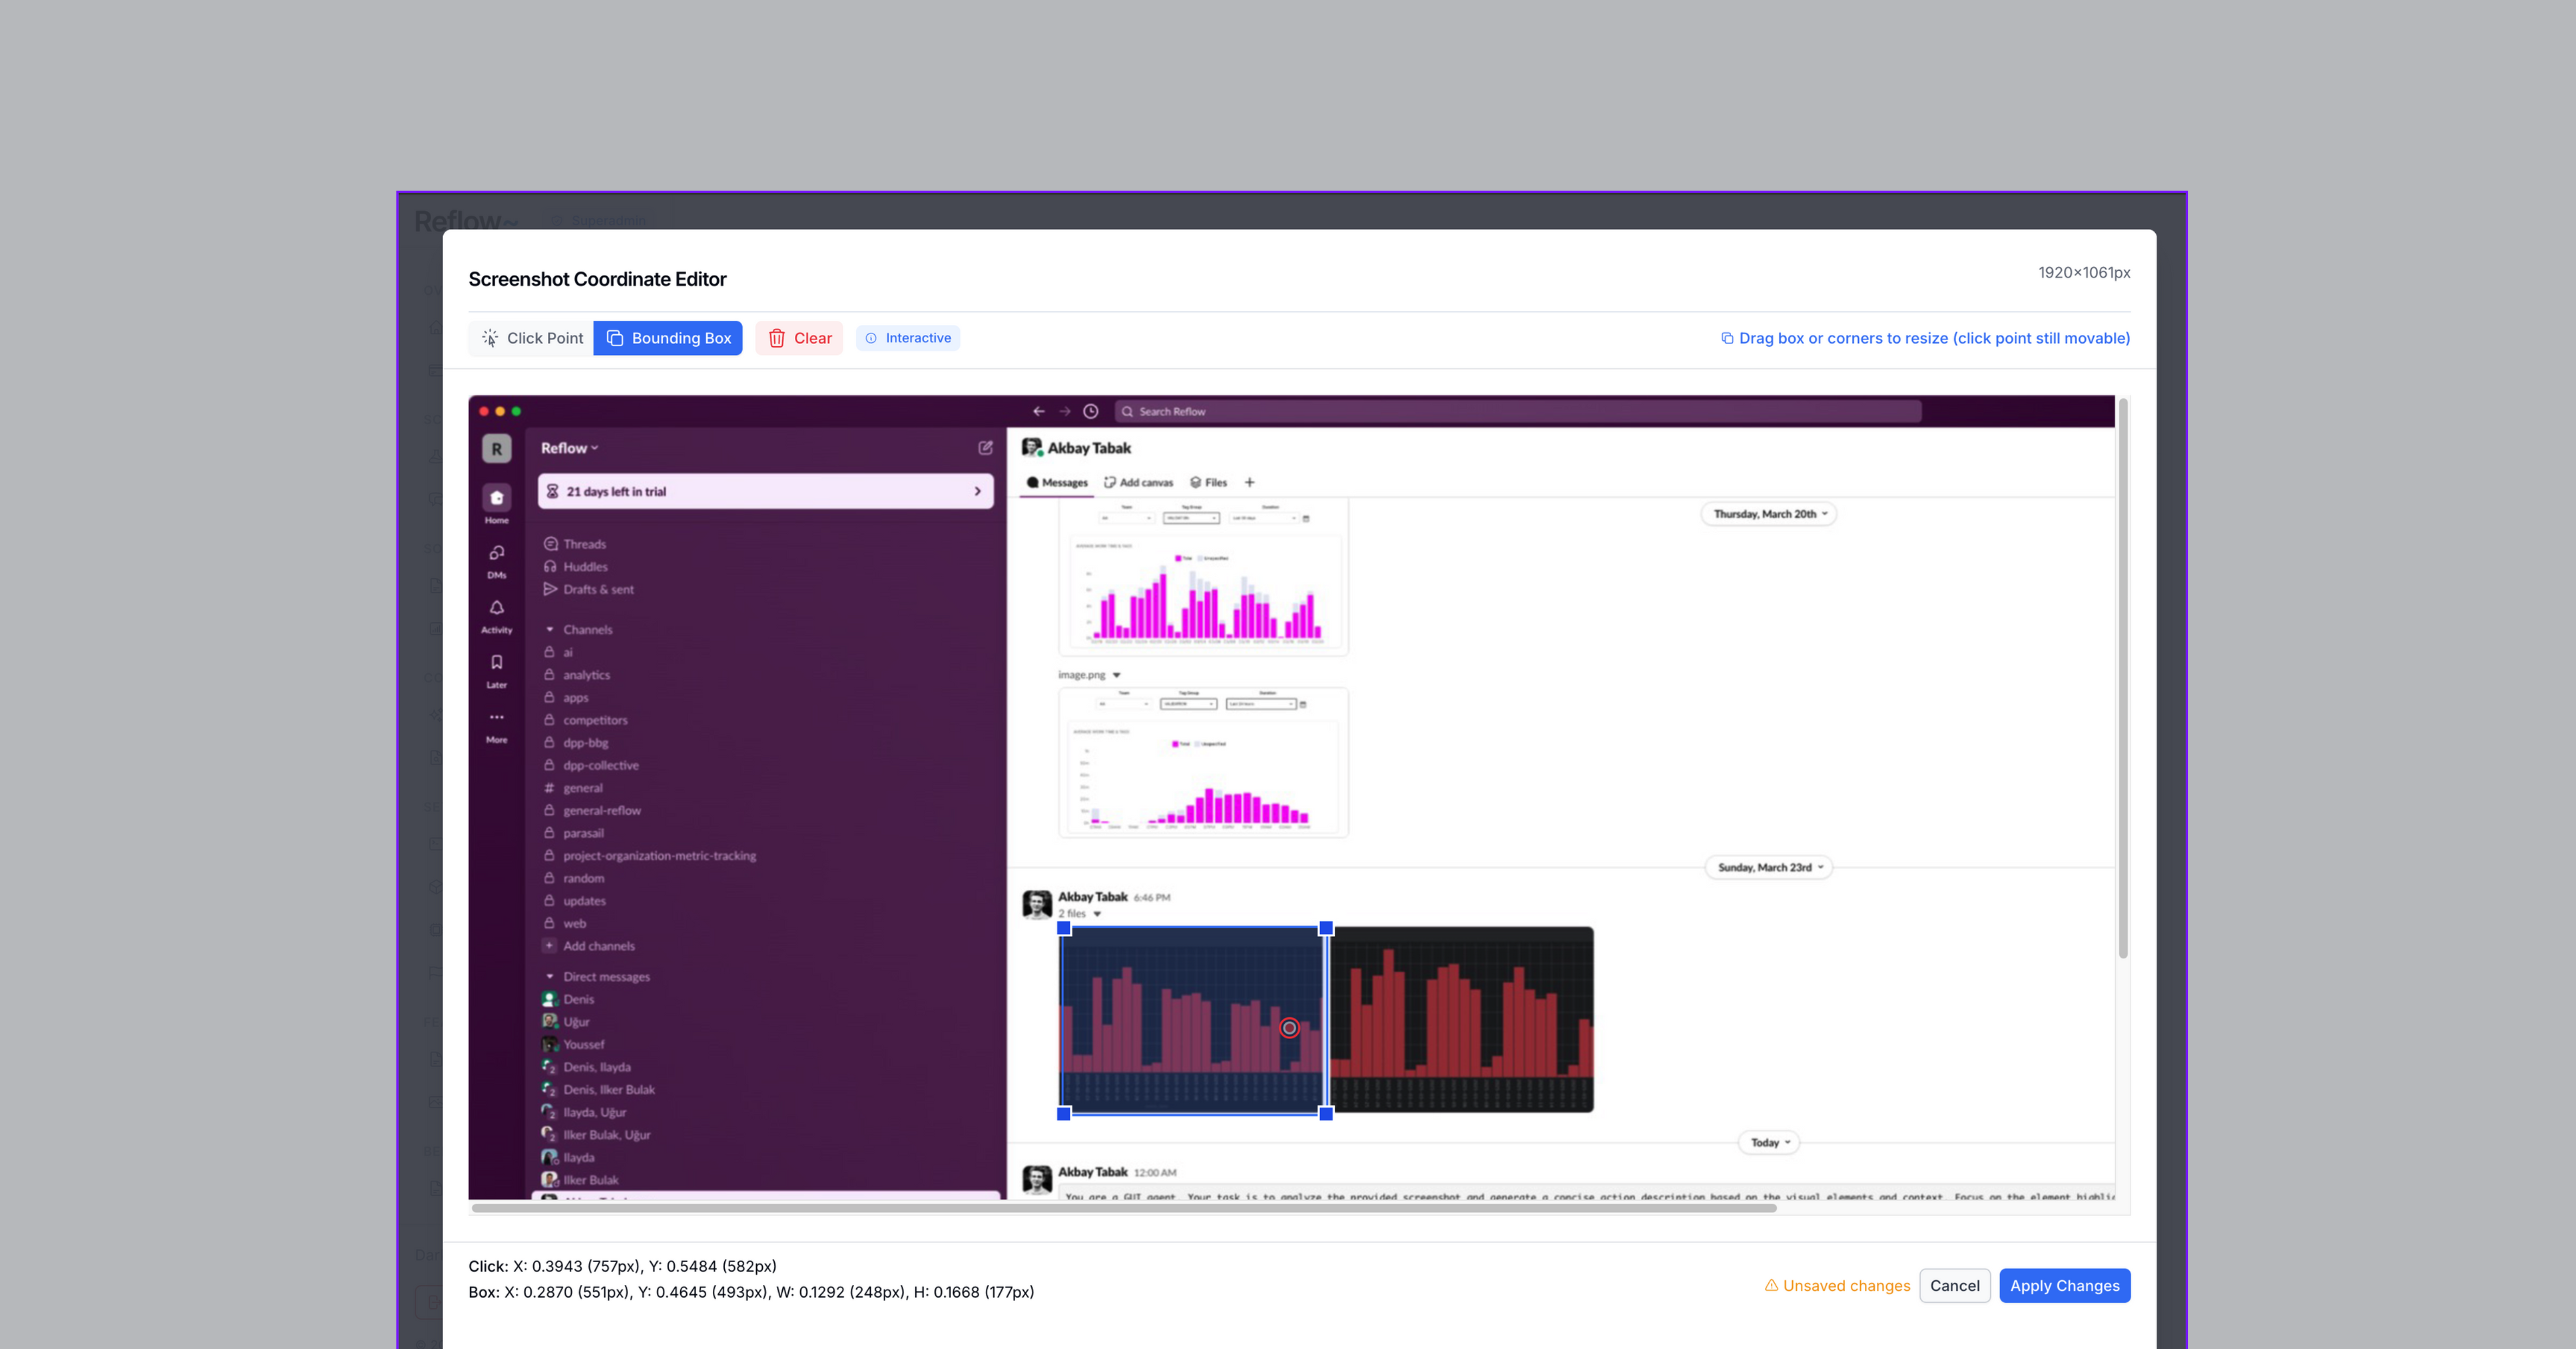
This is a critical step. Ensure you do it correctly to avoid errors.
- Make sure the bounding box and mouse cursor position are accurately placed.
- Always double-check your annotations before saving.
- Click "Apply Changes" to save your work
2. Task Types and Configuration
There are two main labeling tasks, each requiring specific configurations:
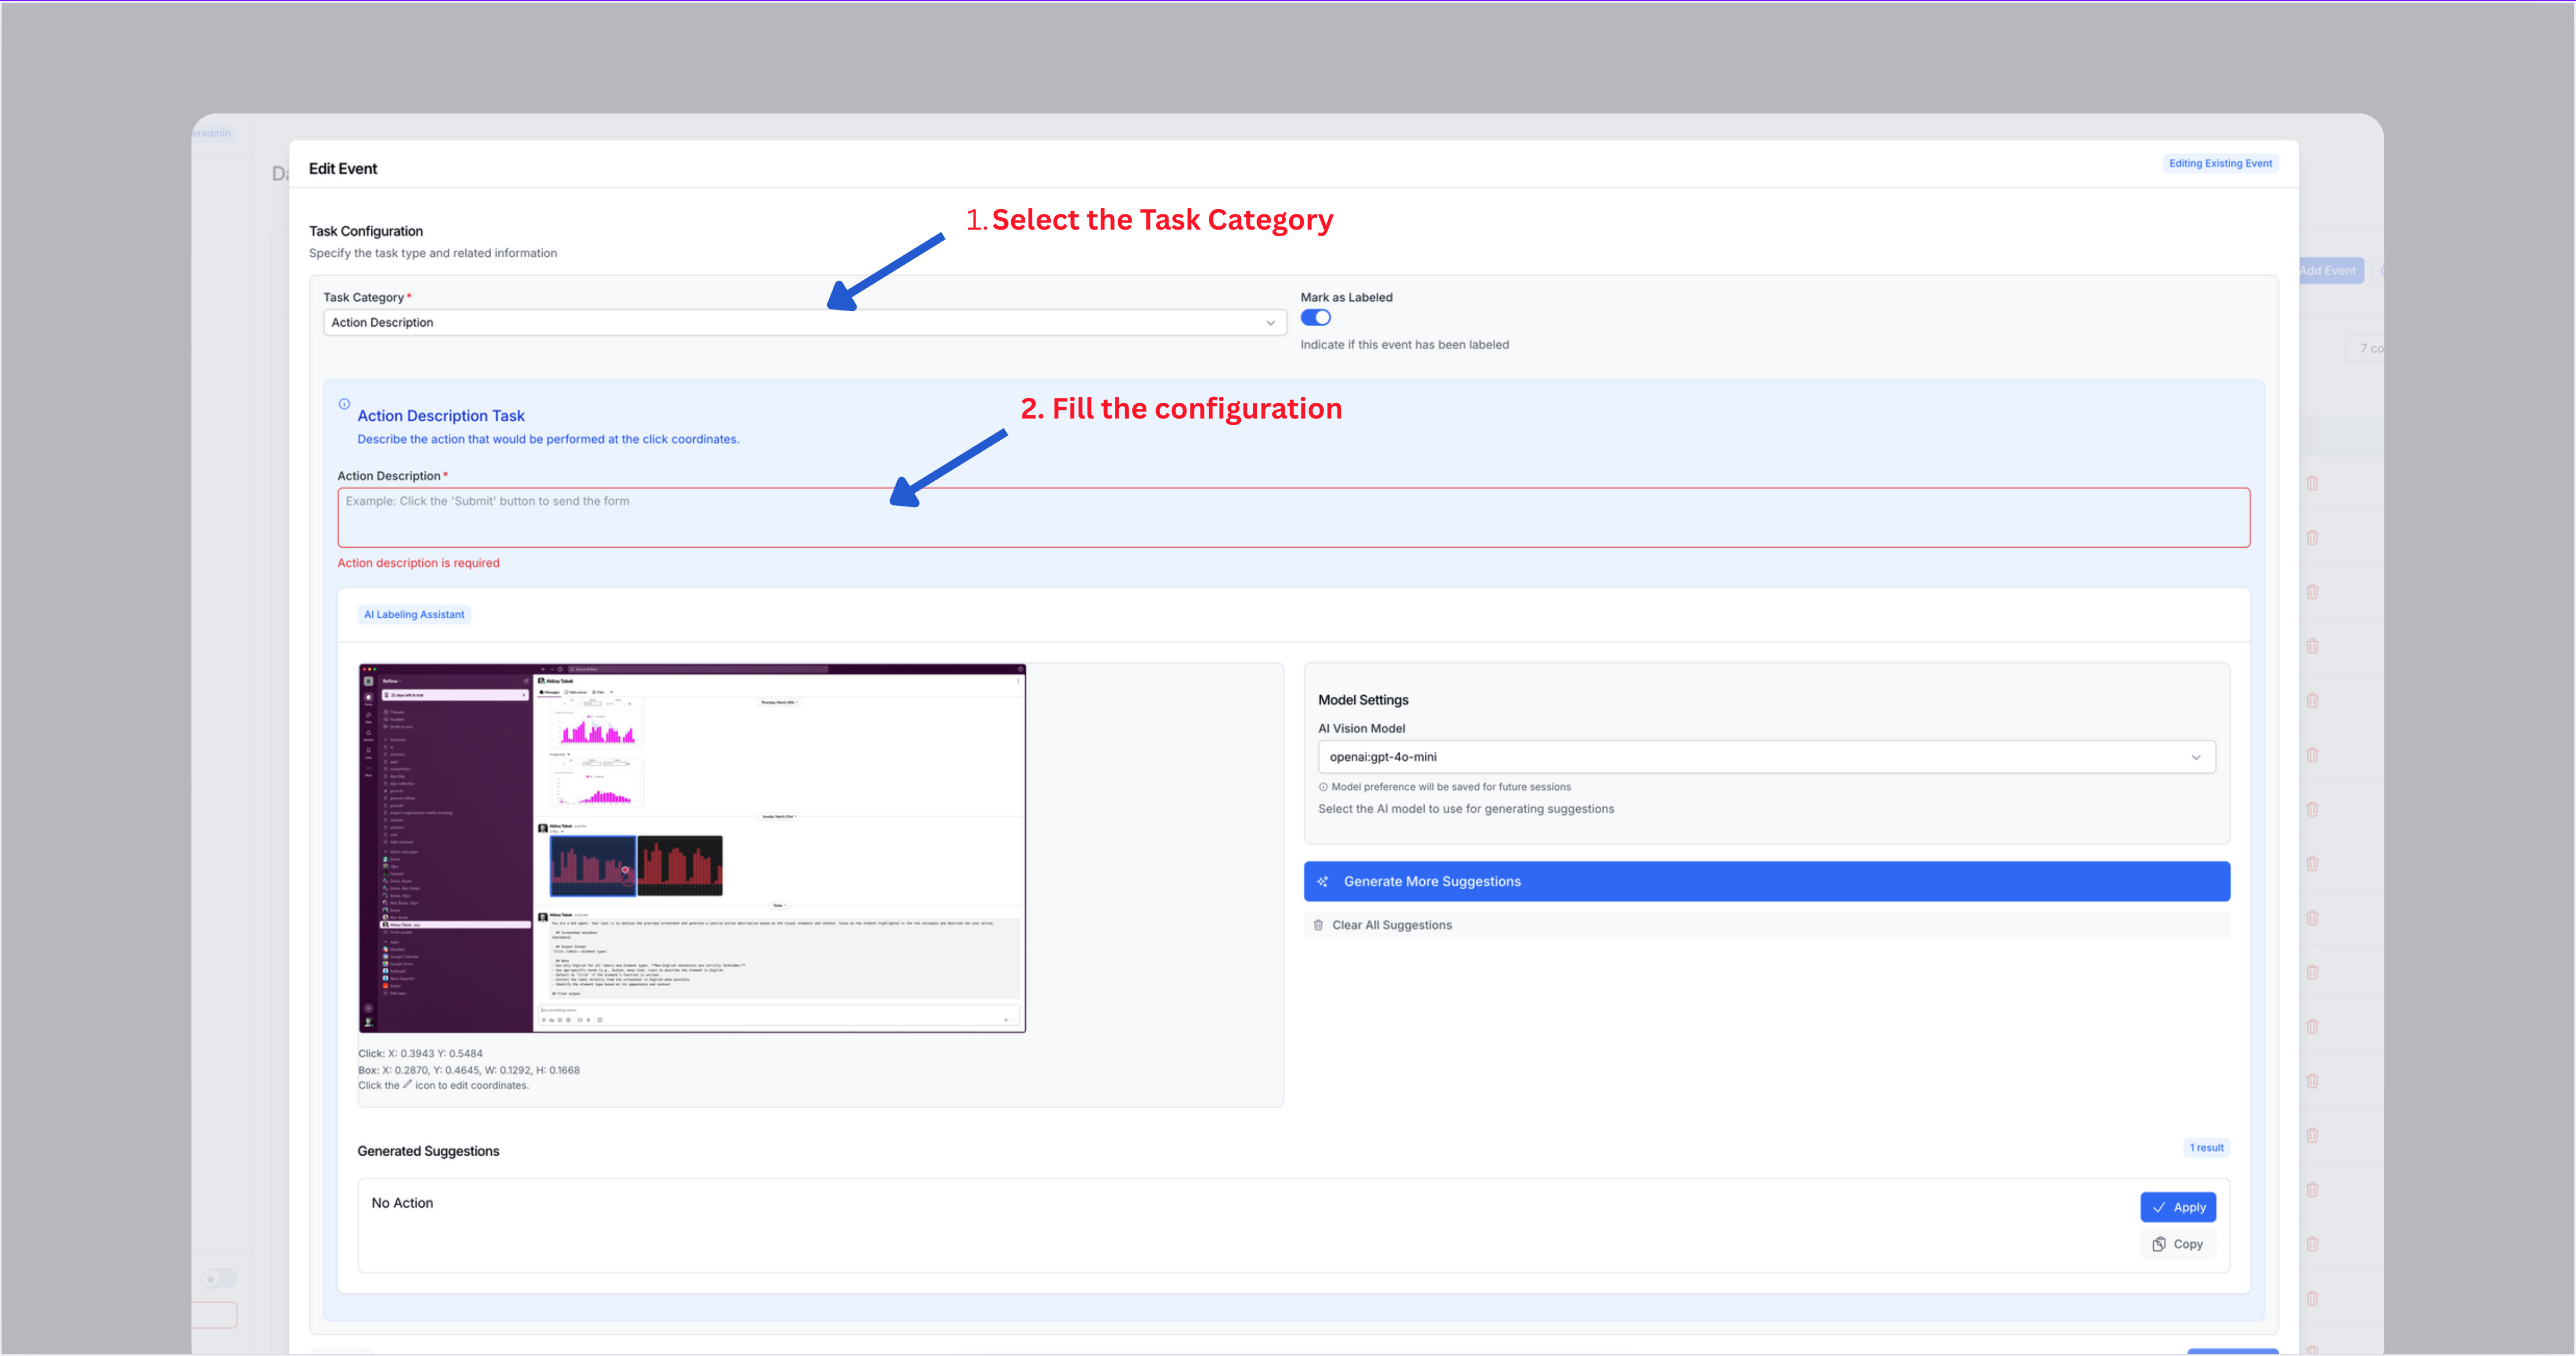
Task 1: Action Description
- Purpose: Extract the action depicted in the screenshot (e.g., "Click Save button").
- Configuration: Fill the "Action Description" field with the expected action based on the screenshot.
Task 2: Context Extraction
- Purpose: Extract contextual information from the screenshot (e.g., "UserID: #123").
- Configuration:
- Define the "Extraction Task" (what you want to extract).
- Specify the "Expected Content" (the expected value of the extraction).
Using the AI Labeling Assistant
You can use the AI Labeling Assistant to generate initial labels, leveraging more accurate models like OpenAI to speed up the process.
- Enable the assistant to suggest preliminary labels.
- Review and adjust the suggestions as needed before saving.
3. Edit event metadata (Optional)
You can skip this step.
4. Marking Events as Labeled
After completing the annotations and configurations:
- Turn on the "Labeled" toggle to mark the event as complete.
- Ensure this step is done to track progress accurately.
- Click the "Save" button to finalize your work.
5. Viewing Labeling History
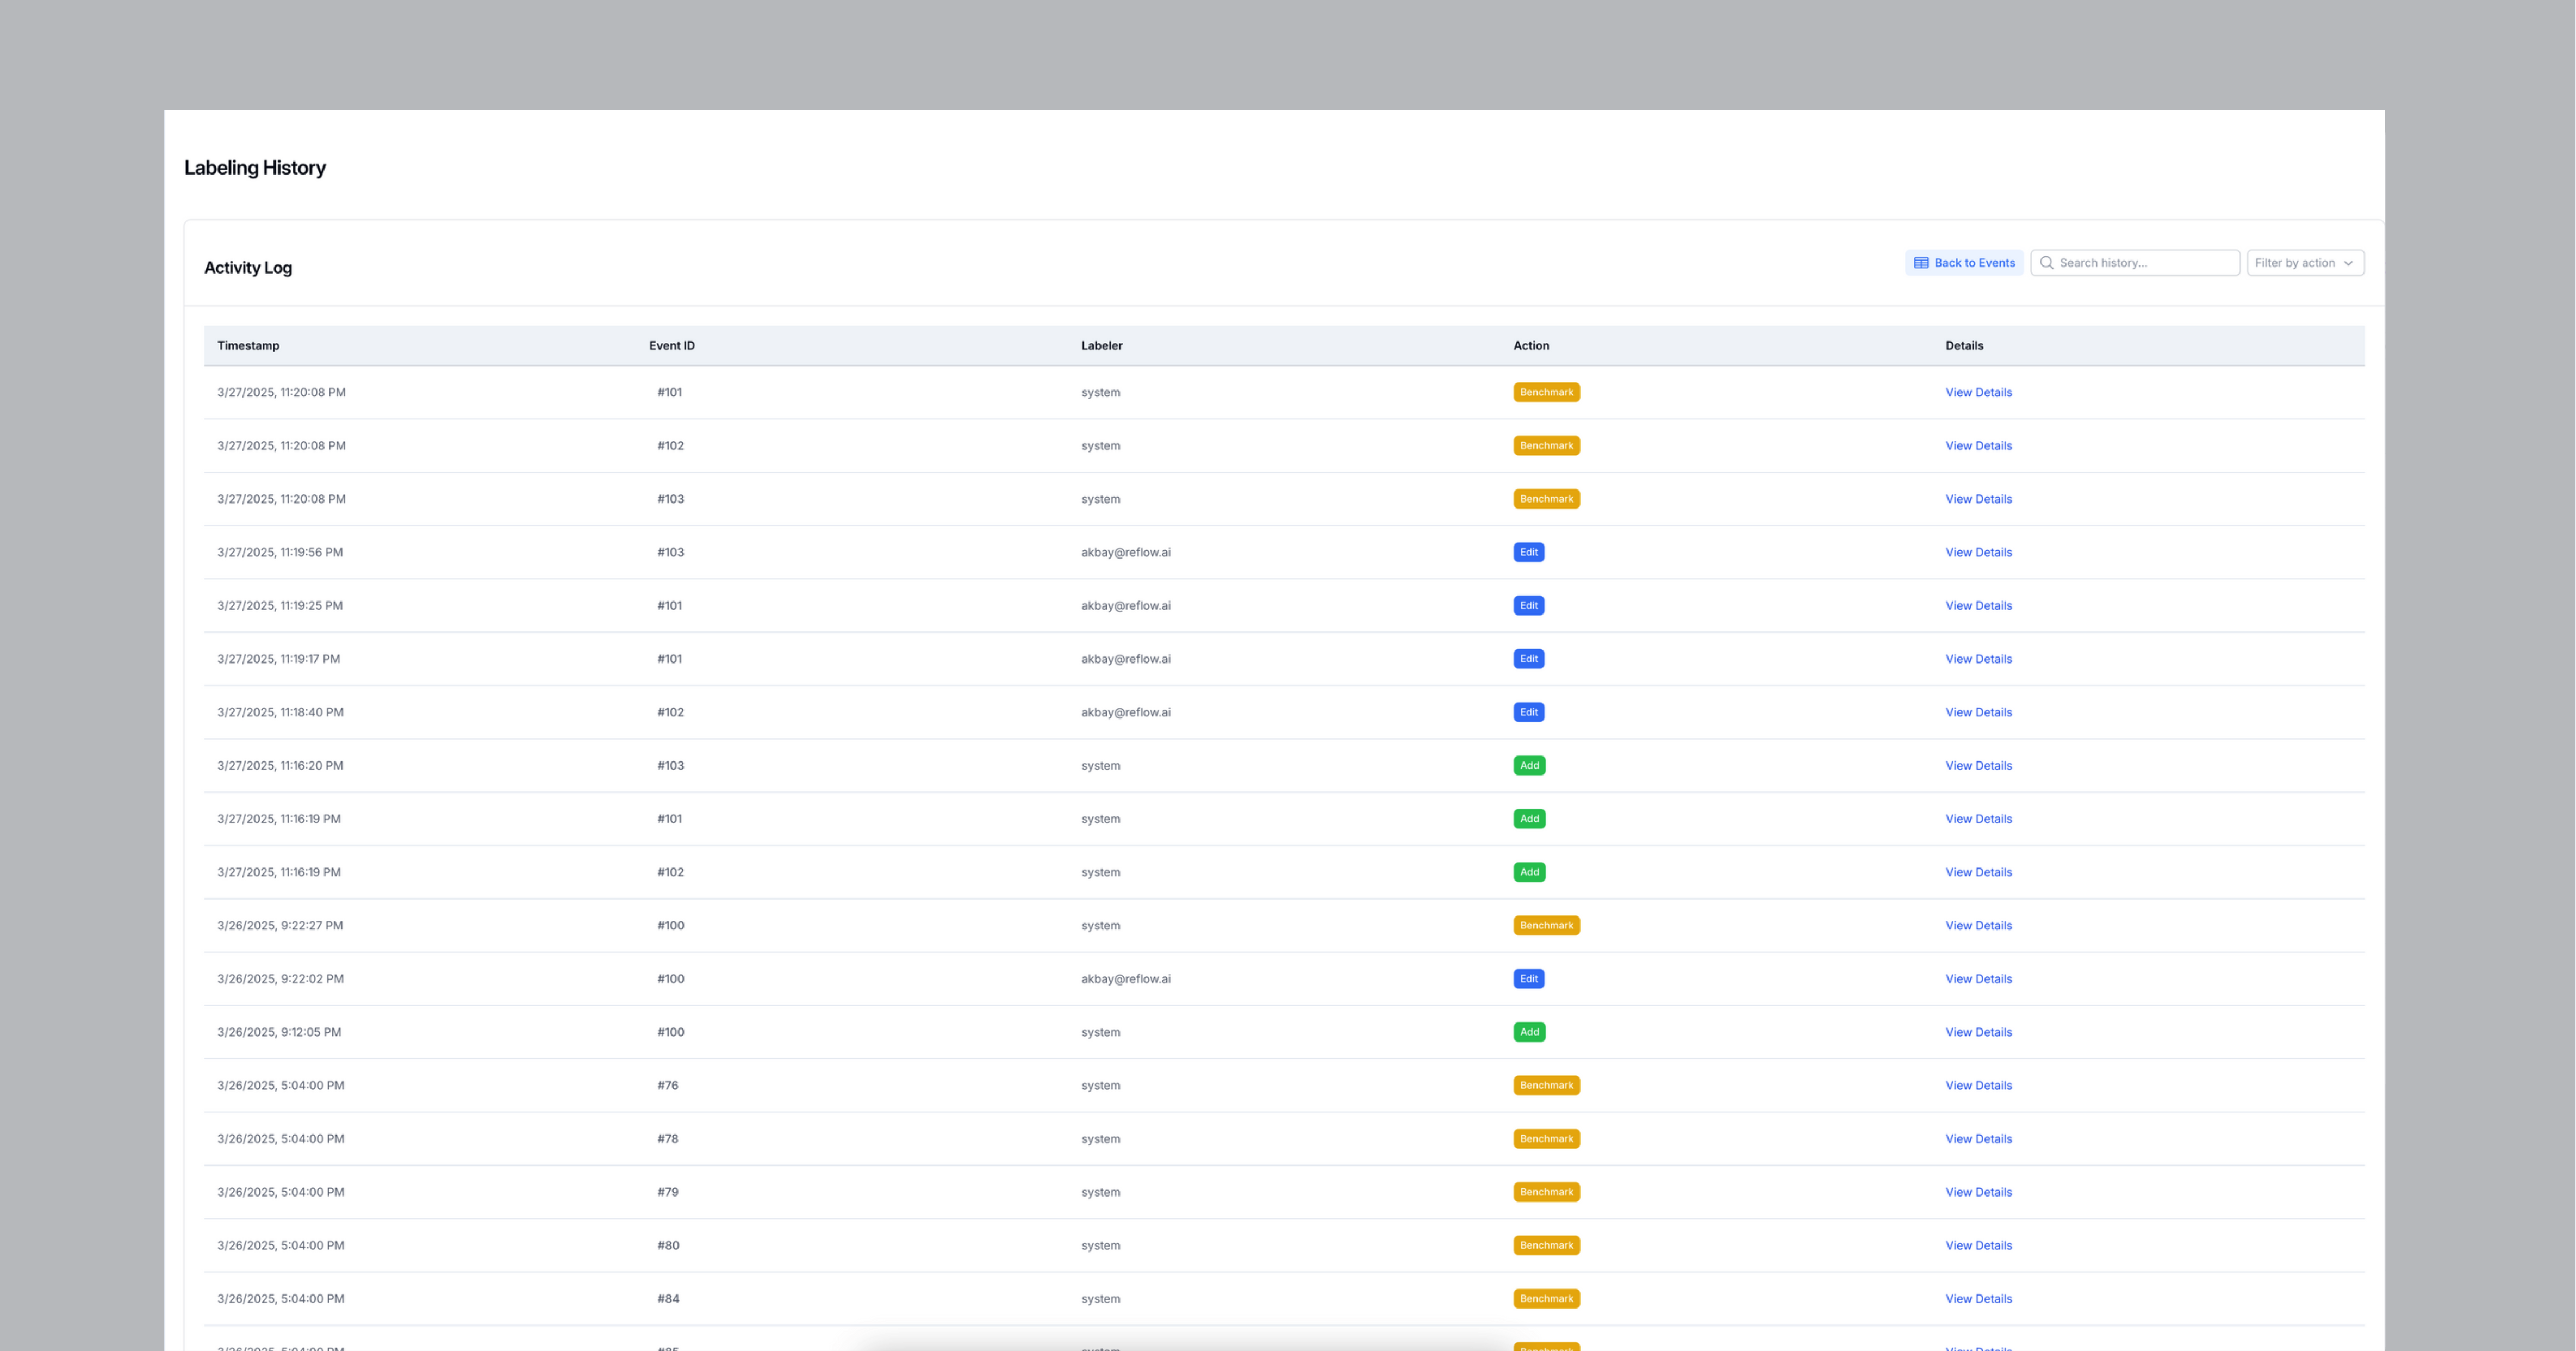
Every labeling action is recorded, including who performed it, to maintain a clear audit trail.
- View the full labeling history in the interface (check the dashboard for the exact location).
- For each individual record, click the clock icon to see its history.
Additional Tips
- Review all annotations for accuracy before marking an event as labeled.
- If using the AI assistant, validate its suggestions to ensure they meet your requirements.
- Contact support if you encounter issues - (for external labelers)